Pada kali ini, saya akan membagi informasi mengenai cara instalasi Sistem Operasi baru pada VMware. cara nya mudah kok, seperti menginstall sistem operasi pada umumnya. Akan tetapi bagi yang belum bisa menginstall SO ya mungkin Vmware lah solusinya, kenapa demikian? jawabanya simpel aja kok, ya.., karena VMware adalah Virtualisasi komputer.
oke dech, kita langsung saja Pada VMware yang telah terinstall klik File->New->Virtual Machine (ctrl+N)
Lalu akan muncul menu seperti ini dan klik Next->
Menu seperti ini pun akan tampil, pilih typical saja dan Next-> lagi :)
Nah setelah ini kita pilih dech Sistem Operasi apa yang akan kita pilih banyak loh pilihanya disitu dari Windows, Linux, Novell Netware, Sun Solaris, dll, pilih dech sesuai dengan tujuan masing-masing. 
Sebagai contoh kita akan menginstall Windows XP Profesional dan klik Next-> lagi. ;)) dan pilihlah nama dan lokasi tempat file Vmware akan di letakan 
Menu seperti ini pun akan muncul, untuk kali ini kita pilih Network Address Translator karena akan dilakukan koneksi antar SO virtual dengan SO host punya kita. Klik saja Next lagi :D 
Nah tentukanlah kapasitas Disk yang akan di pakai, lalu klik Next lagi dan Finish dech 
Masukan CD instalasi ke dalam CD Drive dan jalankan Vmware. 
Lakukan seperti biasa proses instalasi dan Selesai
Format .doc bisa anda donlot di sini
Semoga Bermanfaat.
Showing posts with label software. Show all posts
Showing posts with label software. Show all posts


Nitro Web Accelerator gives you up to 7x faster Internet access using the internationally recognized slipstream software system. Semoga Bermanfaat.
Nitro Internet Proxy Accelerator compresses data before it is delivered to you. By connecting to one of our many proxy servers in Asia and the, not only can you get faster internet access but you will start reducing excess data fees immediately. For example, if you use wireless broadband and your excess data use is 10cents per MB, that's $100 a GB.
Using Nitro Internet Proxy Accelerator, our average compression ratio for http traffic is 4:1 For example, if you use the Optus "'yes' Wireless 1GB*" the excess charges are $0.15 per MB, that's $150.00 a GB - source www.optus.com.au If you live in New Zealand and use the Telecom Business Hub Wireless Broadand, you will be paying $500.00 a GB if you go over your quota - https://www.telecombusinesshub.co.nz If you live in Cambodia, and are using the CamnetDSL - Free Night package, you will be paying $70.00 a GB after you have used your 1100mb of data - source www.camnet.com
If you live in Indonesia, with Speedy Personal DSL, you will be paying Rp 500/MB, after you have used up your 1GB of data, that's approx $50.00US a GB - source Telkom Indonesia You download a small client from the Nitro Internet Proxy website, www.nitroglobal.com, which integrates with your Chrome, Microsoft Internet Explorer, or Firefox browser.
Itu kutipan yang aku ambil dari http://www.softpedia.com/get/Internet/Other-Internet-Related/Nitro-Web-Accelerator.shtml
Ini bukan promosi loh, tapi saya akan memberikan solusi. Yupz, langsung saja Langkah-langkah nya:

Username: trkVyGDMFK
Password: 76664613
Username: trf8tKjvhG
Password: 43392161
Username: trB6dXsBnG
Password: 96723686
Username: trfvdpH2hC
Password: 43721997
Username: trVyDzekSV
Password: 41637953
Username: tr7neEcZR2
Password: 86125449
Username: trSrvysGyp
Password: 24487753
Username: tr4tegSXrq
Password: 94366429
Username: trhzZc1Z5r
Password: 37871328
Username: tr65UXYhzu
Password: 26244938
Thnks untk xyber-breaker
atas informasi Remote Server Hostname dan akun nitro nya. :D
Format .Doc bisa anda donlot di sini
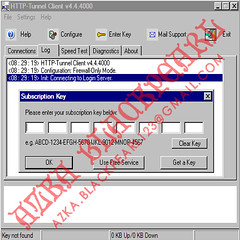
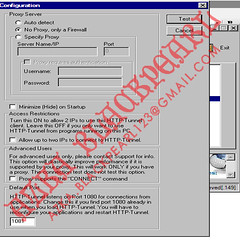
HTTP-Tunnel Client is a computer program created by HTTP-Tunnel Corporation that masks application data as HTTP traffic to bypass firewalls. This is done by routing all outgoing traffic through port 80, In order to mask application traffic with HTTP-Tunnel, the application must implement the SOCKS protocol. This protocol is implemented in several Peer-to-Peer clients, internet browsers, instant messaging applications, and other programs. HTTP-Tunnel Corp is a company with array of products, one of which allows firewall blocked applications to send and receive data from the internet. The firewall blocking the application must be on the side of the HTTP-Tunnel user, and not on that of the remote host. HTTP-Tunnel creates a tunnel -just as its name says- between the user's computer and the outer side of the user's firewall. Currently, HTTP-Tunnel offers a free service for low bandwidth. Paid server you can receive about 400KB a sec. But this depends on your location to their servers and your network speed. Other key word services for HTTP-Tunnel Client are: Bypass firewall, secure browsing, Hide your IP, Socks, HTTP, Tunneling, anonymous browsing, proxy. These are some common reasons for using HTTP-Tunnel: Diambil dari:
the standard HTTP traffic port, and encapsulating this inside HTTP packets. Since almost all firewalls allow HTTP traffic to pass through, the masked application is allowed to communicate with remote hosts. HTTP-Tunnel uses encryption to maintain transfer security[1]. Usage
http://en.wikipedia.org/wiki/HTTP-Tunnel_Client
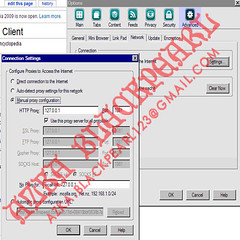
Langsung saja kita praktek:
Format .Doc nya bisa anda donlot di sini
Semoga Bermanfaat.
Subscribe to:
Posts (Atom)